Friday, July 17

Let's Dance ~ GIVEAWAY Winner!

⚪⚪⚪⚪ WINNER ⚪⚪⚪⚪
Sarah!
Congrats! Send me an email with your contact info and I'll get your goodie to you.

Thank you for all who participated and stay tuned for more Favorite Things giveaways.
*************************
Confession, I haven't done a giveaway in a VERY long time.

But I'm sure you already know that...

So let me apologize. In a BIG way. From the bottom of my heart. With all my might.

Soooooooooo soooorrryyyyyy!

In honor of the S&S facelift, who wants a freebie? Me, me, pick me!

Let's face it, good food makes me break out the happy dance. Along with shiny countertops and clean dishes.

Here's an adorable little gem that helps in all those areas...because your kitchen should be used for dancing!

 
To register, comment below with your favorite dance tune. The foot-tapping beat you love best. The song that makes you bust a move in the frozen foods aisle. Stop it, I know I'm not the only one...Hello, Ice Ice Baby...too cold, too cold (pun intended)!

 
Winner will be selected at random on Friday. Tell all your friends and share the joy of doing the running man in your kitchen. Again, just me?
 

Tuesday, July 14

Owl Toast

Let's talk breakfast! Whooooo...whooooo...whoooo's with me? :-)

Continuing our tribute to all early morning delectables, I'm sharing a Little Man favorite.

Truth...not all mornings allow for a warm breakfast buffet. Some are more conducive to grab it and devour in the car...while on your way to the place where you're already 10 minutes late.

You're more concerned with packing the bags...

Wrangling the kids...

Dressing the kids...

Dressing YOURSELF...

And making sure your car's child safety locks are enabled so no one can jump out along the way.

"Did I turn off the coffee pot? Did I even drink coffee?"

Whoosh...who has time for pancakes and fresh squeezed orange juice?

Here's a delightful solution that will keep everybody smiling and Mommy's sanity meter out of the red zone.

Enjoy!

 
Ingredients:
1 piece of whole wheat toast
1 tablespoon peanut butter
Sliced banana
Sliced strawberries
Blueberries
Raisins
 
Toast bread and slather with peanut butter. Bananas for eyes and blueberries for pupils...Do owls have pupils? Sliced strawberries for wings and beak. Raisins for...well...fluff. The remaining banana also makes a perfect tree branch.
 
Whoooo, whoooo, whoooo thinks this is adorable? We do!
 
"Good" mornings turn "great" with a little toast art.
 

More breakfast fun to come, stay tuned!

Monday, July 13


Sausage, Egg & Cheese Waffles

I love sleep because it's like a time machine to breakfast. A good biscuits and gravy can make me want to literally turn back time and experience the day all over again...even a Monday!
 
This is why I've dedicated the entire week to breakfast treats.
 
Hip, hip, hooray! High five...err, fist bump!
 
Today's little bit of goodness was inspired by the infamous "Egg in a nest". If you know me, you're aware of my aversion to eggs. Even fried, they tend to squish or do the spongy "bounce back" thing in my mouth.
 
Not my favorite sensation first thing in the morning. :-/
 
So I put on my creative cap (mostly to cover my unmanageable bedhead), grabbed my trusty waffle maker, and got to work.
 
This, my friends, will make your day (along with a REALLY tall cup of coffee) and inspire a new appreciation for non-squishy, non-spongy eggs. They are also kid-approved and easy for a family on-the-go.
 
Enjoy!
 
 
Ingredients:
1 slice whole wheat bread
1 medium egg
1 tablespoon breakfast sausage, browned & drained
1 tablespoon cheddar cheese, grated
Salt & pepper to taste
 
 
While waiting for waffle maker to heat, cut circular center out of bread slice. I used the top of a mason jar, they're handy for so many things. Ha! Spray waffle maker generously with non-stick spray. Place bread on iron and crack egg in center. Do not fear, your egg with run.  
 
 
Sprinkle breakfast sausage and cheese over egg. Add salt and pepper if you prefer.
 
 
Top with center of bread slice and close the waffle maker top. Let cook until toast is golden brown. It takes mine about 1-2 minutes.
 
 
It will look something like this golden mess. Yum! Remove from maker and trim excess egg from edges (unless you're extremely fond of eggs...in which case, get after it).
 
 
Eat it whole, on the go...slice in half...or quarter for the kiddos. Most of all, enjoy every bite.
 
One for Little Man...

 
And one for Mom!
 
Happy Monday, friends!
 
(Click here for your handy dandy printable.)


Thursday, July 9

Crayon Sandpaper Shirt

Continuing with Little Man's birthday week festivities, I wanted a celebratory shirt. Statement apparel, if you will. :-)
 
Since we live in Podunk, USA, my creative craft supplies are limited. (What can I make with gorilla glue and trash bags?)
 
Have no fear, rural peeps, simple DIY alert! I found this idea from a fellow Blogger (shout out to Alpha Mom) and thought, "I can do that!"
 
With three items, this little cutie is a cinch. For any occasion, any design, I highly recommend it for your next "Let's get creative...but really, you just eat the glue" art session.
 
Happy crafting!
 
 
Let's get started!
 
 
The total cost of this project was $3.88! We had an assortment of crayons, raided Dad's sandpaper stash, and grabbed the white shirt from Wally World (you guessed it, for $3.88).
 
 
With the sheet of sandpaper ready, we began coloring our masterpiece. I chose to use fine sandpaper but use whatever you have on hand. Keep in mind, the more coarse the paper...the more texture will appear on your shirt. (PS. Crayons were absolutely...100%...harmed in the making of this shirt!)

 
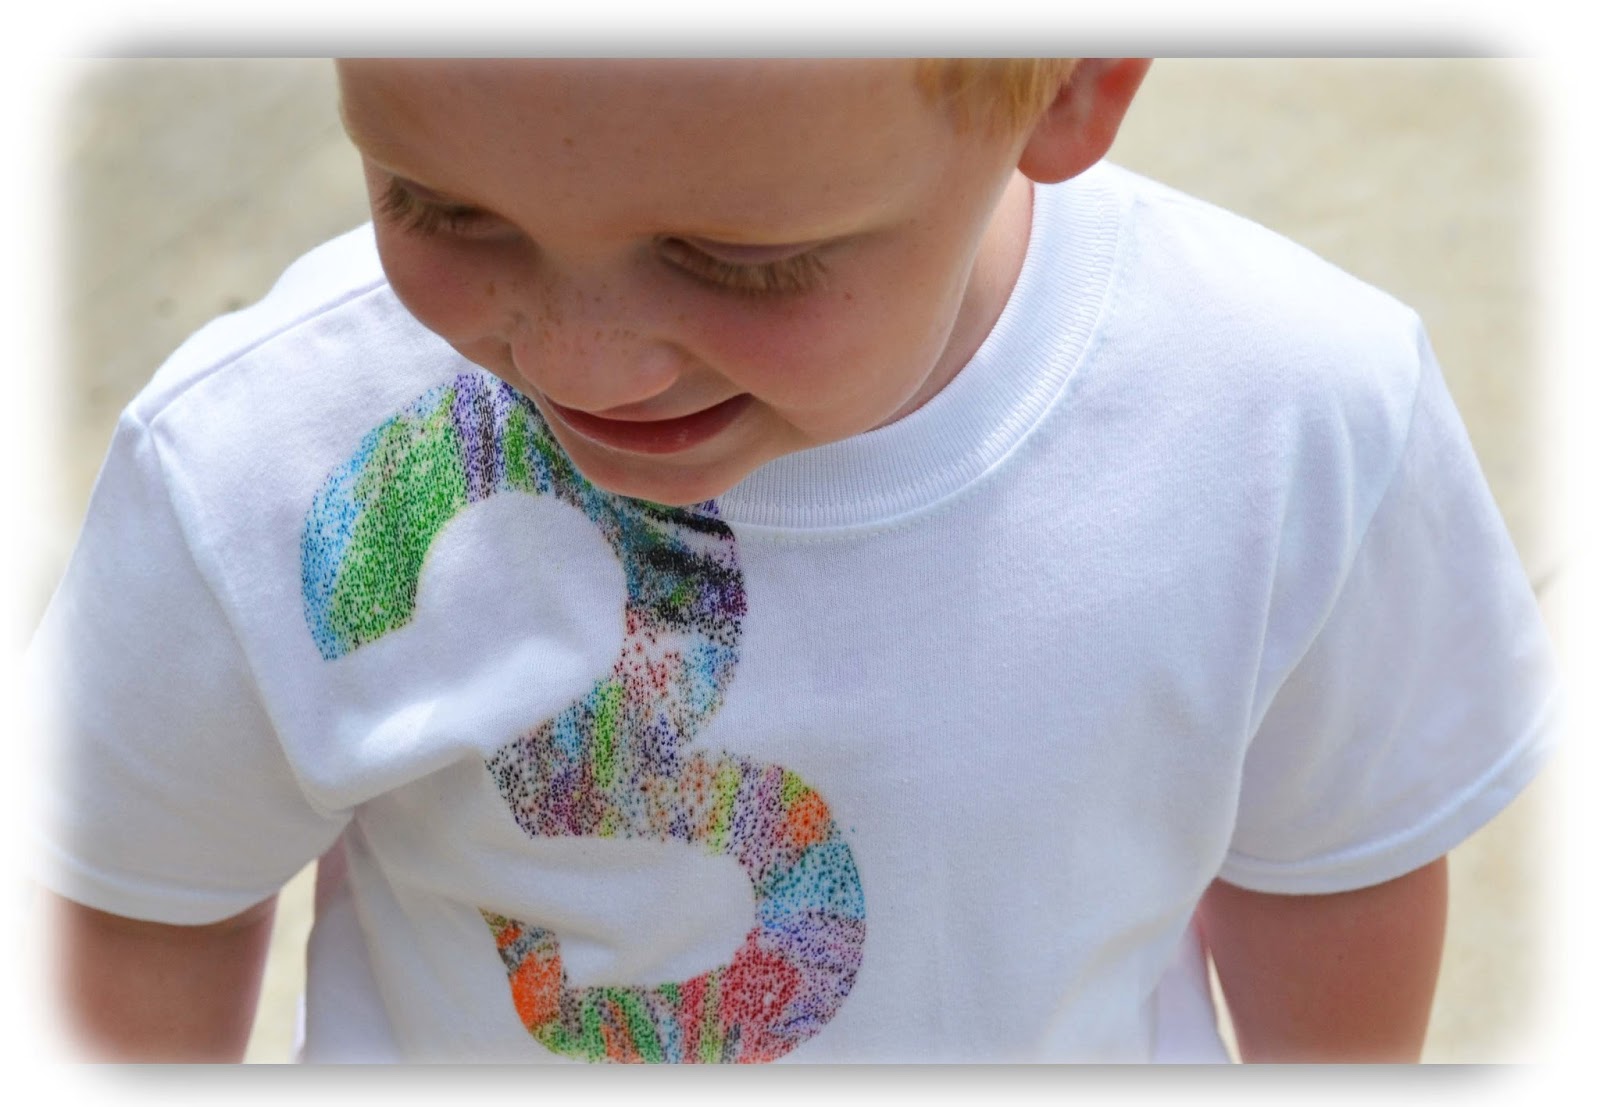
Here's the final result. Look out, Van Gogh! By the way, this is an excellent use for those tiny crayon remnants you've been keeping because you "might use them one day". Today is the day!
 
 
If you are transferring a number or letter, keep in mind it will be a mirror image so be sure to draw on the opposite side of your sandpaper.  After I traced my "3", I cut it out...along with a piece of cardboard to insert inside of shirt, to prevent the color from bleeding. (I saved the remaining sandpaper art for another project...I might use it one day. Ha!)
 

Position your art on the shirt (art side down), make sure the cardboard lines up underneath.

 
Cover sandpaper with thin towel and iron for about 30 seconds on high heat (cotton setting). Make sure your steam is off.
 
 
Remove towel and peek at the design. If you are satisfied with the transfer, remove sandpaper. If you need more color, continue ironing for another 15-20 seconds.

 
TAAADDAAA,  you should now feel so crafty! Looks great!

 
To seal the transfer, place a couple of paper towels over design and iron for about 10 seconds. This will absorb any extra crayon residue. Finally, throw shirt in the dryer for about 20 minutes to set the color and be sure to wash it by itself the first time.


Well, there you have it! Adorable. Get creative and if you make one of your own, I'd love to see it so be sure to share. (Click here for a handy dandy printable.)

Tuesday, July 7

Dirt Cake, Dig In!

Little Man's birthday week festivities are in full swing! Because our family and friends are spread from hither to yonder (yep, that's a real thing), his celebration ends up spanning a ten day period. I hear no one complaining...especially not him!

One of his favorite traditions is Aunt Rekah's special birthday cake. Every year, she creates a treat that makes him momentarily (and rarely) speechless! It's lovely...and the cake is great too. Ha!

This par-tay was no different!With his new interest in bugs, Sista rolled out a first-class dirt cake...ADORNED WITH THE BIGGEST CREEPY CRAWLERS I've ever seen. Eeek!


 Those better not end up in my bed later.


Needless to say, he was a happy...happy boy.


For the first time, I found myself saying..."Let them eat dirt"!  

Another successful culinary creation! Thank you, Aunt Rekah!

Dirt Cake
Ingredients:
1 box instant chocolate pudding mix (I used Sugar Free/Fat Free)
2 cups milk, to prepare pudding
1 14 oz can sweetened condensed milk
8 oz cream cheese (I used Neufchatel), room temperature
8 oz Cool Whip (I used Lite), thawed
18 oz package of Oreo cookies
 
Directions:Mix chocolate pudding according to directions and place in fridge.
 
Chop up all Oreos in food processor.
 
Beat sweetened condensed milk, cream cheese, and Cool Whip until well mixed.
 
Cover bottom of 9x13 glass pan with layer of half the Oreos. Layer with chocolate pudding. Cover with cream mix. Layer remaining Oreo mixture on top.

Decorate with gummy worms, bugs, flowers, etc.

Refrigerate for about 20 minutes or until ready to serve.
 
Dig in! Literally. Ha!

 
(Click here for a handy dandy printable. To purchase larger than life bugs of your own, here's a link.)


Friday, July 3

Berries & Cream Cupcakes

At the risk of completely dating myself, I will quote one of my tween favorites...

"Roll the stone away, It's Independence Day!"

Oh, Martina...where would my stone-washed-Rockies-wearing-self be without you? Probably still staring at my NKOTB poster and talking on my Swatch phone.

With that thought, let's have a cupcake (and "Light up the sky, like the fourth of July")...it's Independence Day!

"Let freedom ring, let the white dove sing!"


Berries & Cream Cupcakes
Cupcake:
1 box yellow cake mix
3/4 cup finely chopped strawberries
2 tablespoons water
1/3 cup vegetable oil
3 large eggs
Fresh berries for garnish (optional)

Icing:
1 stick butter, room temperature
6 oz. cream cheese
1 teaspoon vanilla extract
2 cups powdered sugar

Combine mix, water, oil, and eggs until thoroughly mixed. 

Gently stir in strawberries. 

Fill muffin tin (liners optional) cups half full until mixture is gone.

Bake in 375 degree oven for 20-22 minutes or until golden brown. Set aside to cool on wire rack.

While your kitchen fills with the heavenly aroma of baked goods, prepare the icing by beating butter, cream cheese, and vanilla together. Slowly add powdered sugar until thoroughly mixed.

Pipe on top of cooled cupcakes and sprinkle with your choice of berries as garnish.

Lovely AND delicious, making it the newest addition to the Eye-Catching Edibles.

Enjoy and HAPPY 4TH!

(Click here for a handy dandy printable. You can also pick up the July issue of North Texas Farm & Ranch Magazine to see them paired with Super Hunk's famous Rib recipe.)