Thursday, July 23

Zoom Zoom Fruit

To say Little Man "loves" cars is a gross understatement!

There are no words in the English language that can accurately describe his deep attachment to anything with wheels. They say "it's a boy thing"...but who are "they" anyway? :-) That's the real question.

I digress...

He eats with cars, sleeps with cars, walks with cars, talks about cars, bathes with cars, and...yes...occasionally even poops with cars. TMI alert!

I'm pretty sure his entire thought process throughout the day, in some way, includes a car.

So naturally, when I asked what he wanted for a snack...he responded with "a car".

You can imagine his surprise when Mommy delivered!

With a little creativity, food can literally be oh so much fun.

 
Ingredients:
1 red apple
Grapes
Toothpicks
Peanut butter (optional)


Core apple and cut in slices. Rinse grapes and cut in halves.


Insert toothpick on each end of skinny side of apple slice. Fee free to snip off the ends of the toothpicks if you're trying to fit numerous cars on the same platter.


Place grape half, rounded side in towards apple slice, on toothpick. Repeat for other side.


Once all four grape wheels are attached, it will look something like this. I piped a few numbers on the cars with peanut butter but this is optional.


Tada...the race is on!

 
The look on Little Man's face was priceless (and definitely worth the ten minutes it took to construct them). Of course, the peanut butter was the first to go...that's my boy (Nutella would be good too)!


Get creative and use green apples and green grapes to give the cars a little variety.

Disclaimer: If you don't trust your little ones with toothpicks, you can use the plastic cocktail skewers. They only have one pointed edge and come in fun colors!

 
Zoom Zoom Fruit was a huge success...as seen above! I hope your little ones enjoy it too.

Monday, July 20

Hostess with the Mostest ~ Guest Bedroom Perfection!

Happy Monday! I'm thrilled to take this crazy day and infuse it with a little "Ahhhhhhhh". Let me start by introducing you to our new Guest Contributor, Fancy Nancy, and her invaluable interior design wisdom on creating the perfect space for your guests (she's the MASTER)! Sit back, relax...and enjoy!

Hostess with the Mostest ~ by Fancy Nancy
What better gift to give your guests than a well-appointed guest bedroom? 

Here are thirteen simple ideas for turning that spare room into a thoughtfully designed space. Think of it as a luxury hotel with the feel of your favorite bed and breakfast.

 
1. A bookshelf with an assortment of must-reads. Goodwill or a second-hand bookstore is a great place to pick up some inexpensive books on a wide range of topics.  That way, if your guest doesn’t finish it before they leave, they can take it with them. A couple of magazines are nice for those that want a short read. Just make sure they are current issues.

2. A bedside table with a nice reading lamp. Add a coaster, so your guests don’t have to worry about sitting their glass on your grandmother’s favorite table. A box of Kleenex and bottled water is a welcome touch. Add a flashlight to the nightstand drawer, in case the lights go out. If you have space, a comfy chair with a soft throw can make a cozy reading nook.  Try to leave a plug in plain sight, for charging a phone.

3. Soft, luxurious linens. Anyone who knows me knows this is my weakness.  Buy a nice set of cotton sheets (absolutely no microfiber), and layer the bed with a soft blanket and comforter. Your guests can always fold back what they don’t need.  Have an assortment of pillows on hand so your Goldilocks-like guests can find one that is not too hard, not too soft, but JUST right. Always ask before using down, many people are allergic. Buy the best linens you can afford; they last a long time and are SOOO worth it.

4. A small stool, bench or folding luggage rack. Your guests (and their backs) will thank you when they don’t have to rifle through a suitcase on the floor.  A couple of empty drawers is an added bonus for those who want to unpack. If your room is small and there is no room for a chest, invest in nightstands with drawers that can pull double duty.

5. A small basket of snacks; cookies, breakfast bars and nuts, especially if your guests have kids.

6. Write your wi-fi password on a small card and leave on the nightstand. Your guests will appreciate it.

7. Clear at least 18-24 inches of closet space and don’t forget some extra hangers. Leave a fan in plain sight in the closet in case your guests prefer sleeping with a fan.

8. Don’t throw away that old single cup coffeemaker. A small table can hold a couple of cups, spoons, napkins and a small assortment of coffees. If your guests are early risers, they can have that first cup in their room.  I call it "the pajama bar".

9. Hoard those hotel soaps, shampoos and lotions to make a small basket for the guest bath in case they forgot something. Visit the travel-size aisle of the drug store and pick up toothpaste and an extra toothbrush. A miniature bottle of Tylenol will be appreciated. A small sewing kit for that loose button is also a thoughtful addition.

10. Big, fluffy towels and washcloths. White will make your guests feel like they are at the Four Seasons, but don’t forget to add some colored washcloths for make-up removal.  A terry robe hanging on the back of the bathroom door will enhance the spa-like experience. A small basket for dirty towels is nice as well.

11. Clear a space on the bathroom vanity for your guest’s personal objects, or add a small table in the bathroom. That cluttered vanity may be pretty, but not functional.

12. A nightlight lighting the way to the bathroom is a welcome addition. And make sure the bathroom has a trash can.

13. A small bouquet of fresh flowers adds a personal touch. Something as simple as a rose from your garden makes it even more special.

And finally, don’t forget this fabulous room is part of YOUR home. When you don’t have guests, use it as your own little getaway place. Close the door, put out the "Do Not Disturb" sign and enjoy the beautiful space you have created.  You deserve it!

(Thank you, Fancy Nancy, for the great tips! Until we decorate again...)


Photos from Zillow.com

Friday, July 17

Let's Dance ~ GIVEAWAY Winner!

⚪⚪⚪⚪ WINNER ⚪⚪⚪⚪
Sarah!
Congrats! Send me an email with your contact info and I'll get your goodie to you.

Thank you for all who participated and stay tuned for more Favorite Things giveaways.
*************************
Confession, I haven't done a giveaway in a VERY long time.

But I'm sure you already know that...

So let me apologize. In a BIG way. From the bottom of my heart. With all my might.

Soooooooooo soooorrryyyyyy!

In honor of the S&S facelift, who wants a freebie? Me, me, pick me!

Let's face it, good food makes me break out the happy dance. Along with shiny countertops and clean dishes.

Here's an adorable little gem that helps in all those areas...because your kitchen should be used for dancing!

 
To register, comment below with your favorite dance tune. The foot-tapping beat you love best. The song that makes you bust a move in the frozen foods aisle. Stop it, I know I'm not the only one...Hello, Ice Ice Baby...too cold, too cold (pun intended)!

 
Winner will be selected at random on Friday. Tell all your friends and share the joy of doing the running man in your kitchen. Again, just me?
 

Tuesday, July 14

Owl Toast

Let's talk breakfast! Whooooo...whooooo...whoooo's with me? :-)

Continuing our tribute to all early morning delectables, I'm sharing a Little Man favorite.

Truth...not all mornings allow for a warm breakfast buffet. Some are more conducive to grab it and devour in the car...while on your way to the place where you're already 10 minutes late.

You're more concerned with packing the bags...

Wrangling the kids...

Dressing the kids...

Dressing YOURSELF...

And making sure your car's child safety locks are enabled so no one can jump out along the way.

"Did I turn off the coffee pot? Did I even drink coffee?"

Whoosh...who has time for pancakes and fresh squeezed orange juice?

Here's a delightful solution that will keep everybody smiling and Mommy's sanity meter out of the red zone.

Enjoy!

 
Ingredients:
1 piece of whole wheat toast
1 tablespoon peanut butter
Sliced banana
Sliced strawberries
Blueberries
Raisins
 
Toast bread and slather with peanut butter. Bananas for eyes and blueberries for pupils...Do owls have pupils? Sliced strawberries for wings and beak. Raisins for...well...fluff. The remaining banana also makes a perfect tree branch.
 
Whoooo, whoooo, whoooo thinks this is adorable? We do!
 
"Good" mornings turn "great" with a little toast art.
 

More breakfast fun to come, stay tuned!

Monday, July 13


Sausage, Egg & Cheese Waffles

I love sleep because it's like a time machine to breakfast. A good biscuits and gravy can make me want to literally turn back time and experience the day all over again...even a Monday!
 
This is why I've dedicated the entire week to breakfast treats.
 
Hip, hip, hooray! High five...err, fist bump!
 
Today's little bit of goodness was inspired by the infamous "Egg in a nest". If you know me, you're aware of my aversion to eggs. Even fried, they tend to squish or do the spongy "bounce back" thing in my mouth.
 
Not my favorite sensation first thing in the morning. :-/
 
So I put on my creative cap (mostly to cover my unmanageable bedhead), grabbed my trusty waffle maker, and got to work.
 
This, my friends, will make your day (along with a REALLY tall cup of coffee) and inspire a new appreciation for non-squishy, non-spongy eggs. They are also kid-approved and easy for a family on-the-go.
 
Enjoy!
 
 
Ingredients:
1 slice whole wheat bread
1 medium egg
1 tablespoon breakfast sausage, browned & drained
1 tablespoon cheddar cheese, grated
Salt & pepper to taste
 
 
While waiting for waffle maker to heat, cut circular center out of bread slice. I used the top of a mason jar, they're handy for so many things. Ha! Spray waffle maker generously with non-stick spray. Place bread on iron and crack egg in center. Do not fear, your egg with run.  
 
 
Sprinkle breakfast sausage and cheese over egg. Add salt and pepper if you prefer.
 
 
Top with center of bread slice and close the waffle maker top. Let cook until toast is golden brown. It takes mine about 1-2 minutes.
 
 
It will look something like this golden mess. Yum! Remove from maker and trim excess egg from edges (unless you're extremely fond of eggs...in which case, get after it).
 
 
Eat it whole, on the go...slice in half...or quarter for the kiddos. Most of all, enjoy every bite.
 
One for Little Man...

 
And one for Mom!
 
Happy Monday, friends!
 
(Click here for your handy dandy printable.)


Thursday, July 9

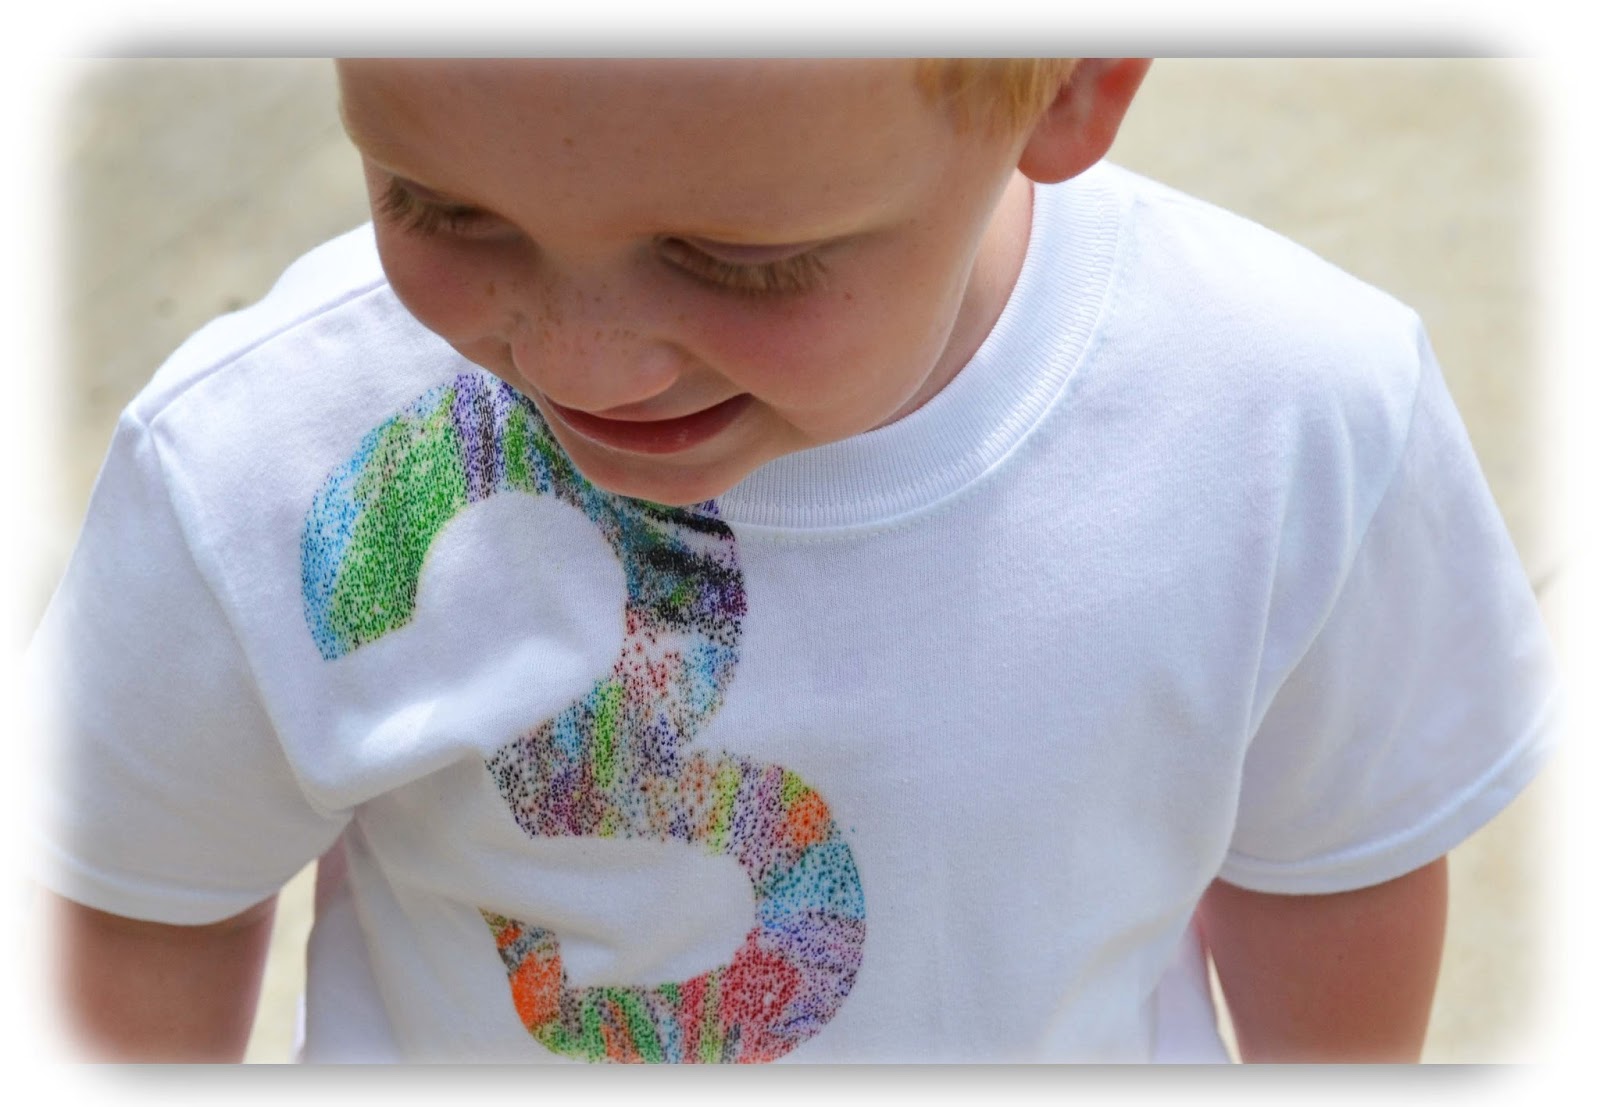
Crayon Sandpaper Shirt

Continuing with Little Man's birthday week festivities, I wanted a celebratory shirt. Statement apparel, if you will. :-)
 
Since we live in Podunk, USA, my creative craft supplies are limited. (What can I make with gorilla glue and trash bags?)
 
Have no fear, rural peeps, simple DIY alert! I found this idea from a fellow Blogger (shout out to Alpha Mom) and thought, "I can do that!"
 
With three items, this little cutie is a cinch. For any occasion, any design, I highly recommend it for your next "Let's get creative...but really, you just eat the glue" art session.
 
Happy crafting!
 
 
Let's get started!
 
 
The total cost of this project was $3.88! We had an assortment of crayons, raided Dad's sandpaper stash, and grabbed the white shirt from Wally World (you guessed it, for $3.88).
 
 
With the sheet of sandpaper ready, we began coloring our masterpiece. I chose to use fine sandpaper but use whatever you have on hand. Keep in mind, the more coarse the paper...the more texture will appear on your shirt. (PS. Crayons were absolutely...100%...harmed in the making of this shirt!)

 
Here's the final result. Look out, Van Gogh! By the way, this is an excellent use for those tiny crayon remnants you've been keeping because you "might use them one day". Today is the day!
 
 
If you are transferring a number or letter, keep in mind it will be a mirror image so be sure to draw on the opposite side of your sandpaper.  After I traced my "3", I cut it out...along with a piece of cardboard to insert inside of shirt, to prevent the color from bleeding. (I saved the remaining sandpaper art for another project...I might use it one day. Ha!)
 

Position your art on the shirt (art side down), make sure the cardboard lines up underneath.

 
Cover sandpaper with thin towel and iron for about 30 seconds on high heat (cotton setting). Make sure your steam is off.
 
 
Remove towel and peek at the design. If you are satisfied with the transfer, remove sandpaper. If you need more color, continue ironing for another 15-20 seconds.

 
TAAADDAAA,  you should now feel so crafty! Looks great!

 
To seal the transfer, place a couple of paper towels over design and iron for about 10 seconds. This will absorb any extra crayon residue. Finally, throw shirt in the dryer for about 20 minutes to set the color and be sure to wash it by itself the first time.


Well, there you have it! Adorable. Get creative and if you make one of your own, I'd love to see it so be sure to share. (Click here for a handy dandy printable.)